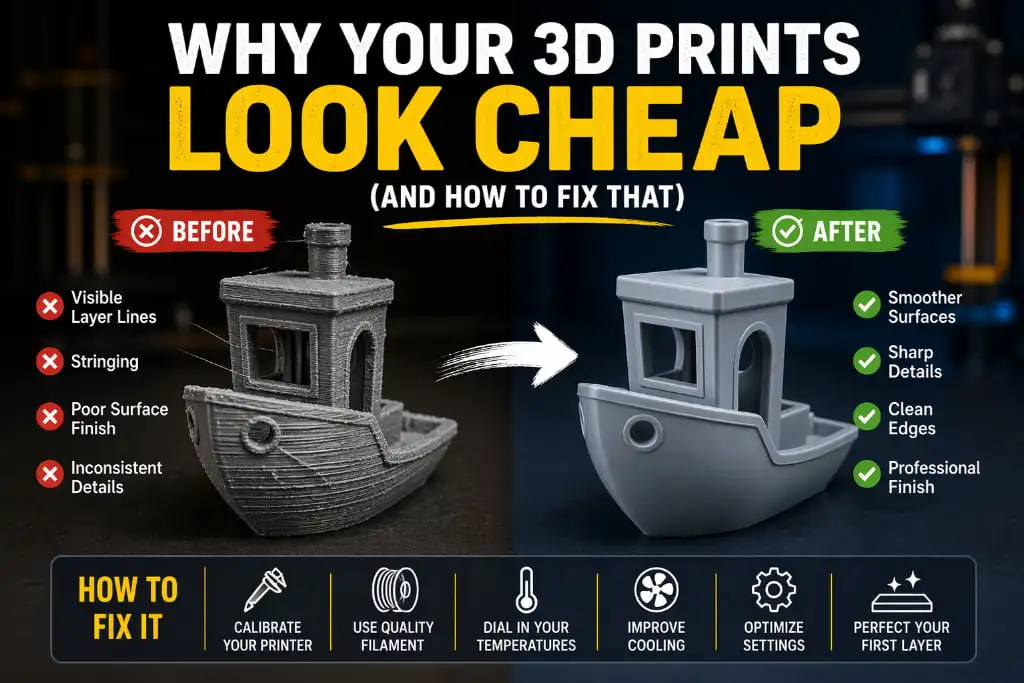
You spent hours finding the perfect model, set everything up, waited through a long print — and the result looks rough, dull, and nothing like the smooth finished object you imagined.
It does not look bad exactly. It just looks… cheap.
If that feeling sounds familiar, you are not alone. This is one of the most common frustrations in 3D printing, and the good news is — it is almost always fixable. The quality gap between a cheap-looking print and a professional-looking one is not about having a better printer. It is about knowing what actually affects the final appearance of a printed object.
Here is exactly what is making your prints look low quality, and what you can do about it.
1. Your Layer Height Is Too High
The most visible sign of a cheap-looking print is the staircase effect — those obvious horizontal lines running up the side of your model. This happens when the layer height is set too high.
The fix: Drop your layer height to 0.1 mm or 0.12 mm for models where appearance matters. Yes, the print will take longer. But the surface will look dramatically smoother and the details will be much sharper. For decorative printed objects, the extra time is always worth it.
Think of it like photo resolution — more layers mean more detail and a cleaner final look.
2. You Are Printing Too Fast
Speed is the enemy of quality. When the print head moves too fast, it cannot lay filament down cleanly and consistently. The result is rough outer walls, gaps, and a surface that looks rushed — because it was.
The fix: Slow your outer wall speed down to 25–30 mm/s. The inside of your print can move faster, but the outer perimeters are what people see. Taking your time on the outside walls makes an enormous difference in how the final printed object looks.
If you are printing something purely for display or presentation, slow the entire print speed down to 40 mm/s and see the difference for yourself.
3. Poor Filament Quality
Not all filaments are created equal. Low-quality or old filament produces prints with inconsistent surfaces, dull finishes, and weak layer bonding. You can have perfect settings and still get a bad-looking result if the filament itself is the problem.
The fix: Invest in a reputable filament brand. Quality filaments are manufactured to tighter diameter tolerances, which means more consistent extrusion and a cleaner surface finish. Also, always store your filaments in sealed bags or containers with desiccant — moisture-damaged filament produces rough, bubbly surfaces that no amount of setting adjustments can fix.
Good filament is not expensive. But cheap filament costs you more in wasted prints and frustration.
4. No Post-Processing
Straight off the printer, even a good print has visible layer lines and a slightly rough texture. Most professional-looking 3D printed objects you see online have been post-processed — they did not come out of the printer looking that way.
The fix: Try these simple post-processing steps:
- Sanding — Start with 200 grit sandpaper and work up to 1000 or 2000 grit for a smooth surface. Always sand in small circular motions.
- Priming — A coat of filler primer fills in small imperfections and gives you a uniform surface to paint on.
- Painting — Even a basic spray paint coat transforms the look of a printed object completely. Use light, even coats and let each layer dry fully.
- Resin coating — Products like XTC-3D or epoxy resin can be brushed over PLA prints to fill layer lines and create a glossy, professional finish without sanding.
Post-processing is where good prints become great ones. Do not skip it.
5. Wrong Infill Pattern Showing Through
On thin-walled models, the infill pattern inside can actually show through the outer walls — creating an ugly texture on the surface that makes the print look unfinished.
The fix: Increase your wall count to 3 or 4 perimeters. More outer walls mean the infill is further from the surface and less likely to show through. For models with thin sections, you can also switch to a gyroid or cubic infill pattern, which distributes pressure more evenly and shows through less than grid patterns.
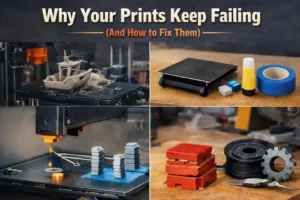
6. Stringing and Blobs
Thin strings of plastic between parts of your model, or small blobs and zits on the surface — these are immediate signs of a print that looks low quality and unfinished.
The fix: Tune your retraction settings. A retraction distance of 4–6 mm (for Bowden setups) at around 40 mm/s usually clears up most stringing issues. Also lower your print temperature by 5°C and see if that helps. For blobs, enable “coasting” in your slicer — it stops extruding just before the end of a wall segment, preventing pressure buildup that causes surface blemishes.
7. Ignoring Cooling
Insufficient cooling causes surfaces to sag slightly before they solidify, leading to a soft, undefined look on curved surfaces and overhangs. Good cooling locks each layer in place quickly and keeps details crisp.
The fix: Make sure your part cooling fan is set to 100% after the first few layers. If your printer has a weak stock fan, consider upgrading it — better cooling is one of the single biggest upgrades you can make for print quality.
Small Changes, Big Results
Here is the thing about 3D printing quality — you do not need to do everything at once. Pick one or two of these fixes, apply them to your next print, and compare the results. You will be surprised how much of a difference even a single change can make.
A great-looking printed object is not about luck or having the most expensive equipment. It is about understanding what each setting does and caring about the details. Once that clicks, your prints will never look cheap again.
Get Professional Quality Every Time — 3DReality Is Here
At 3DReality, we know exactly what separates a cheap-looking print from a product-ready one — because we have been doing this at a professional level for years. Our team of experts handles everything from material selection and print settings to finishing and post-processing, so every printed object that leaves our hands looks and performs at its best.
Whether you need a polished prototype, a custom product, or a full production run, we bring the experience, precision, and care your project deserves.
Do not settle for cheap-looking prints. Partner with 3DReality and let us help you create 3D products that truly stand out — reach out to us today.
FAQ’s
Q1. Why do my 3D prints look rough and unfinished?
High layer height and fast print speed are the main reasons — lower both for a smoother result.
Q2. Does filament quality affect print appearance?
Yes — cheap or wet filament causes dull, rough surfaces. Always use quality, dry filament.
Q3. How do I make my 3D printed object look professional?
Sand it, prime it, and paint it. Simple post-processing transforms any print completely.
Q4. What causes stringing in 3D prints?
Wrong retraction settings or high temperatures cause stringing. Tune retraction and lower temp slightly.
Q5. How many walls should I use for a better looking print?
Use at least 3 to 4 walls — it gives your printed object a cleaner, stronger outer surface.